How to Purchase & Activate
Your License
Choose your preferred method to upgrade your Everest Web Deals Google add-on. Whether you need a standard card checkout or want to submit a purchase order google add-on request, follow our guides to activate your license.
Stripe Checkout
Credit & Debit Cards- Google Add-on Sidebar: Supported (Instant)
- Website Pricing Page: Links Supported (Instant)
- Best for immediate personal or single-user upgrades.
- Note: License is sent to your add-on email. Transfer instructions are included.
PayPal Checkout
PayPal & Pay Later- Google Add-on Sidebar: Not Supported
- Website Pricing Page: Links Supported
- PayPal is available only on our website pricing page.
- Note: License is sent to your PayPal email. Transfer instructions are included.
Purchase Order (PO)
USA Organizations Only- Google Add-on Sidebar: Not Supported
- Website PO Request Form: USA Only (Net-30)
- Net-30 terms & signed W-9 for USA public schools & districts.
Purchasing for a School, District, or Organization?
If you need to cover multiple users under the same organization, a Domain License is the best choice. It covers all users sharing your Google Workspace domain (e.g., user1@school.edu and user2@school.edu).
- Supported Methods: Stripe checkout, PayPal checkout, or Purchase Orders (USA only).
- Easy Activation: Auto-activates for all domain users once the license is set up.
- Personal Gmail Accounts: Individual Gmail accounts (e.g., `@gmail.com`) cannot use domain licenses.
- Multiple Domains: Contact billing support if you need to cover multiple subdomains.
- Security & Privacy: We are compliant with standard data privacy regulations. Read details in our Security & Privacy Center.
Stripe (Credit / Debit Card) Instructions
Stripe is our primary secure payment processor. You can pay with your credit/debit card either directly inside the Google add-on sidebar, or on our website pricing page. Both options provide instant activation.
Review our data processing, security controls, and DPA compliance in our Security & Privacy Center.
Option A: Pay Directly Inside Google Add-on Sidebar (Recommended)
Fastest and most seamless. Your license is automatically linked to your Google Workspace account.
Open the Google app or file where you use the Google add-on. Click the Add-ons icon (the puzzle piece) in the top-right toolbar, and select your Google add-on. In this guide, Form Choice Limiter is used as an example; the same instructions apply to other Everest Web Deals Google add-ons.
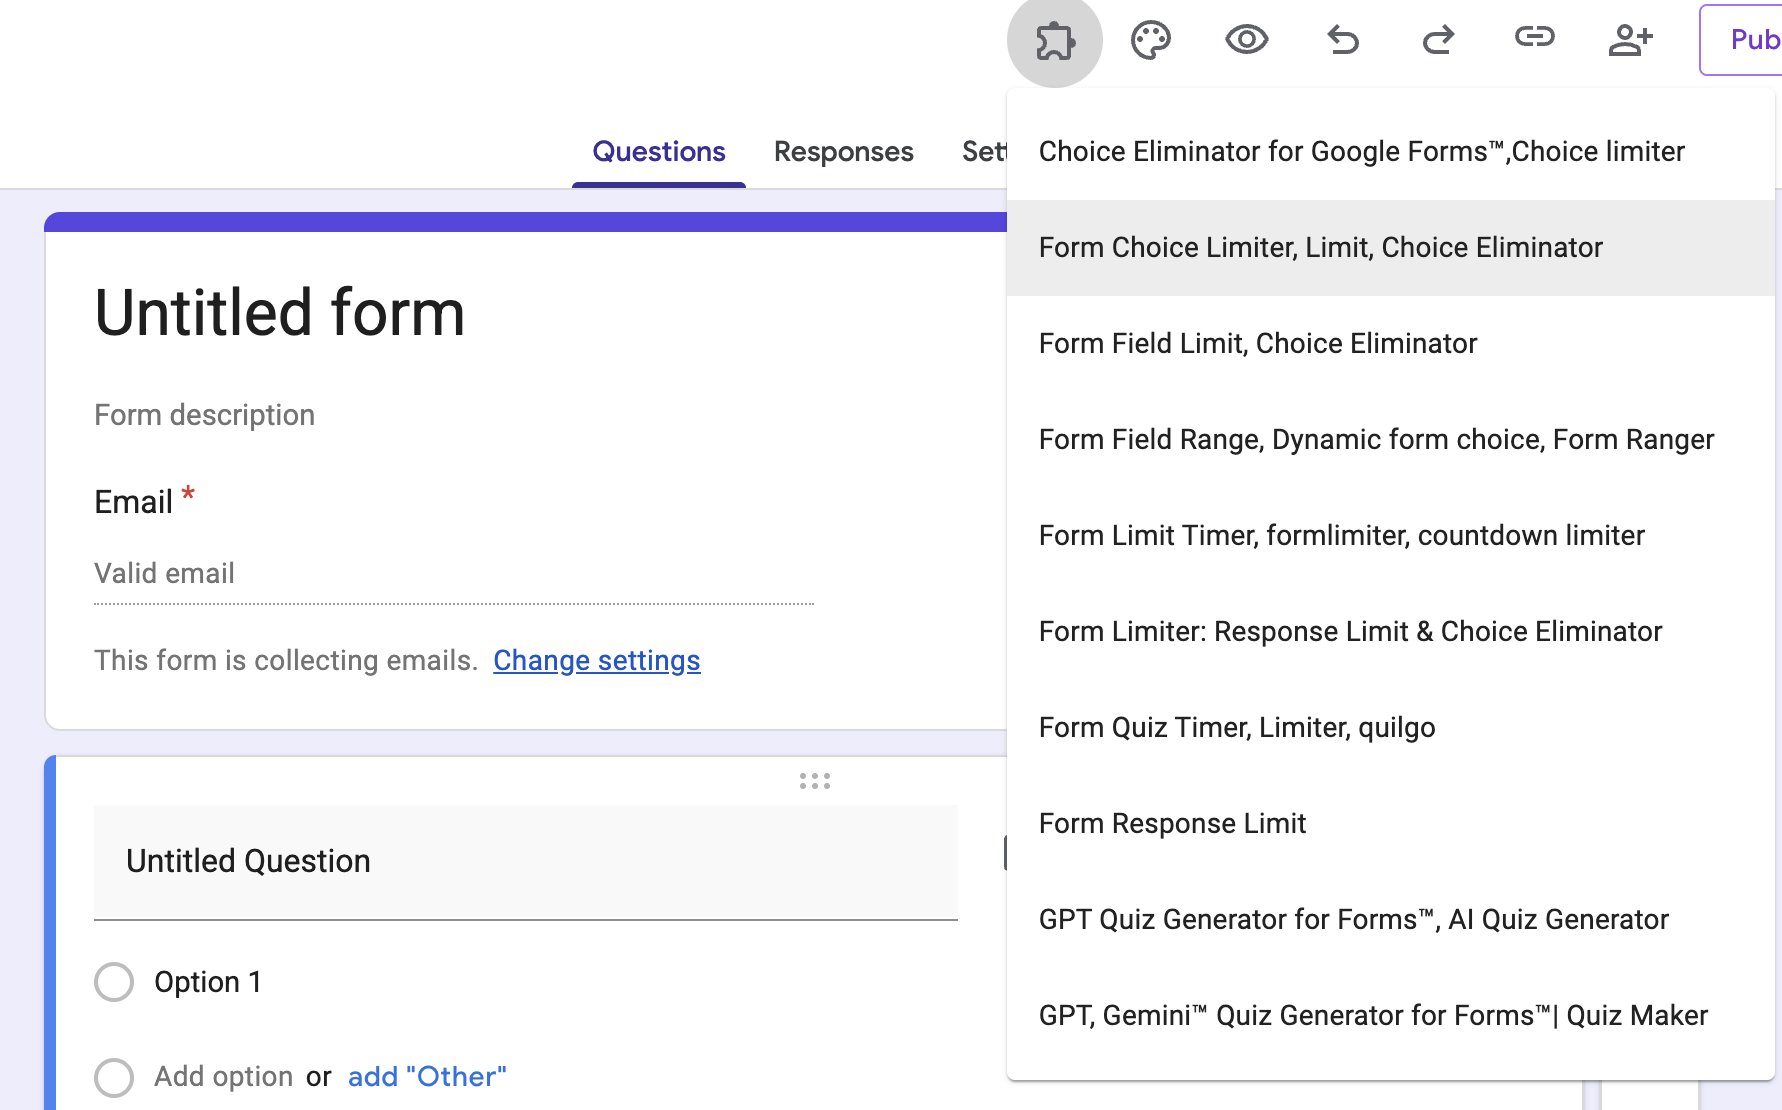
Click on License from the dropdown menu to open the licensing management sidebar.
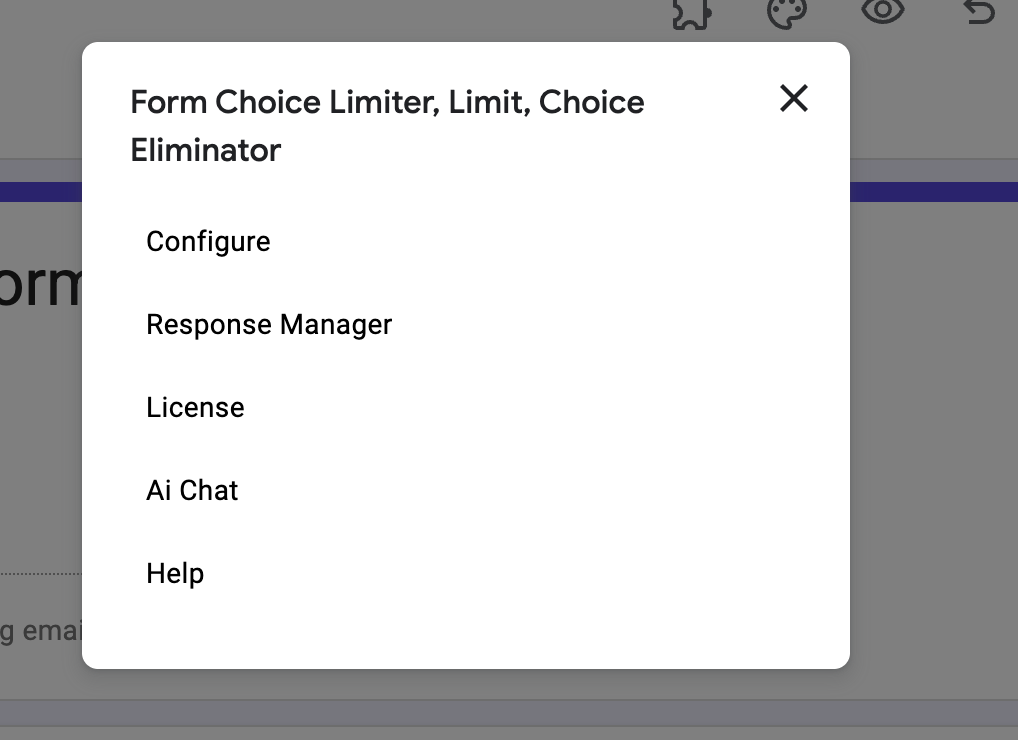
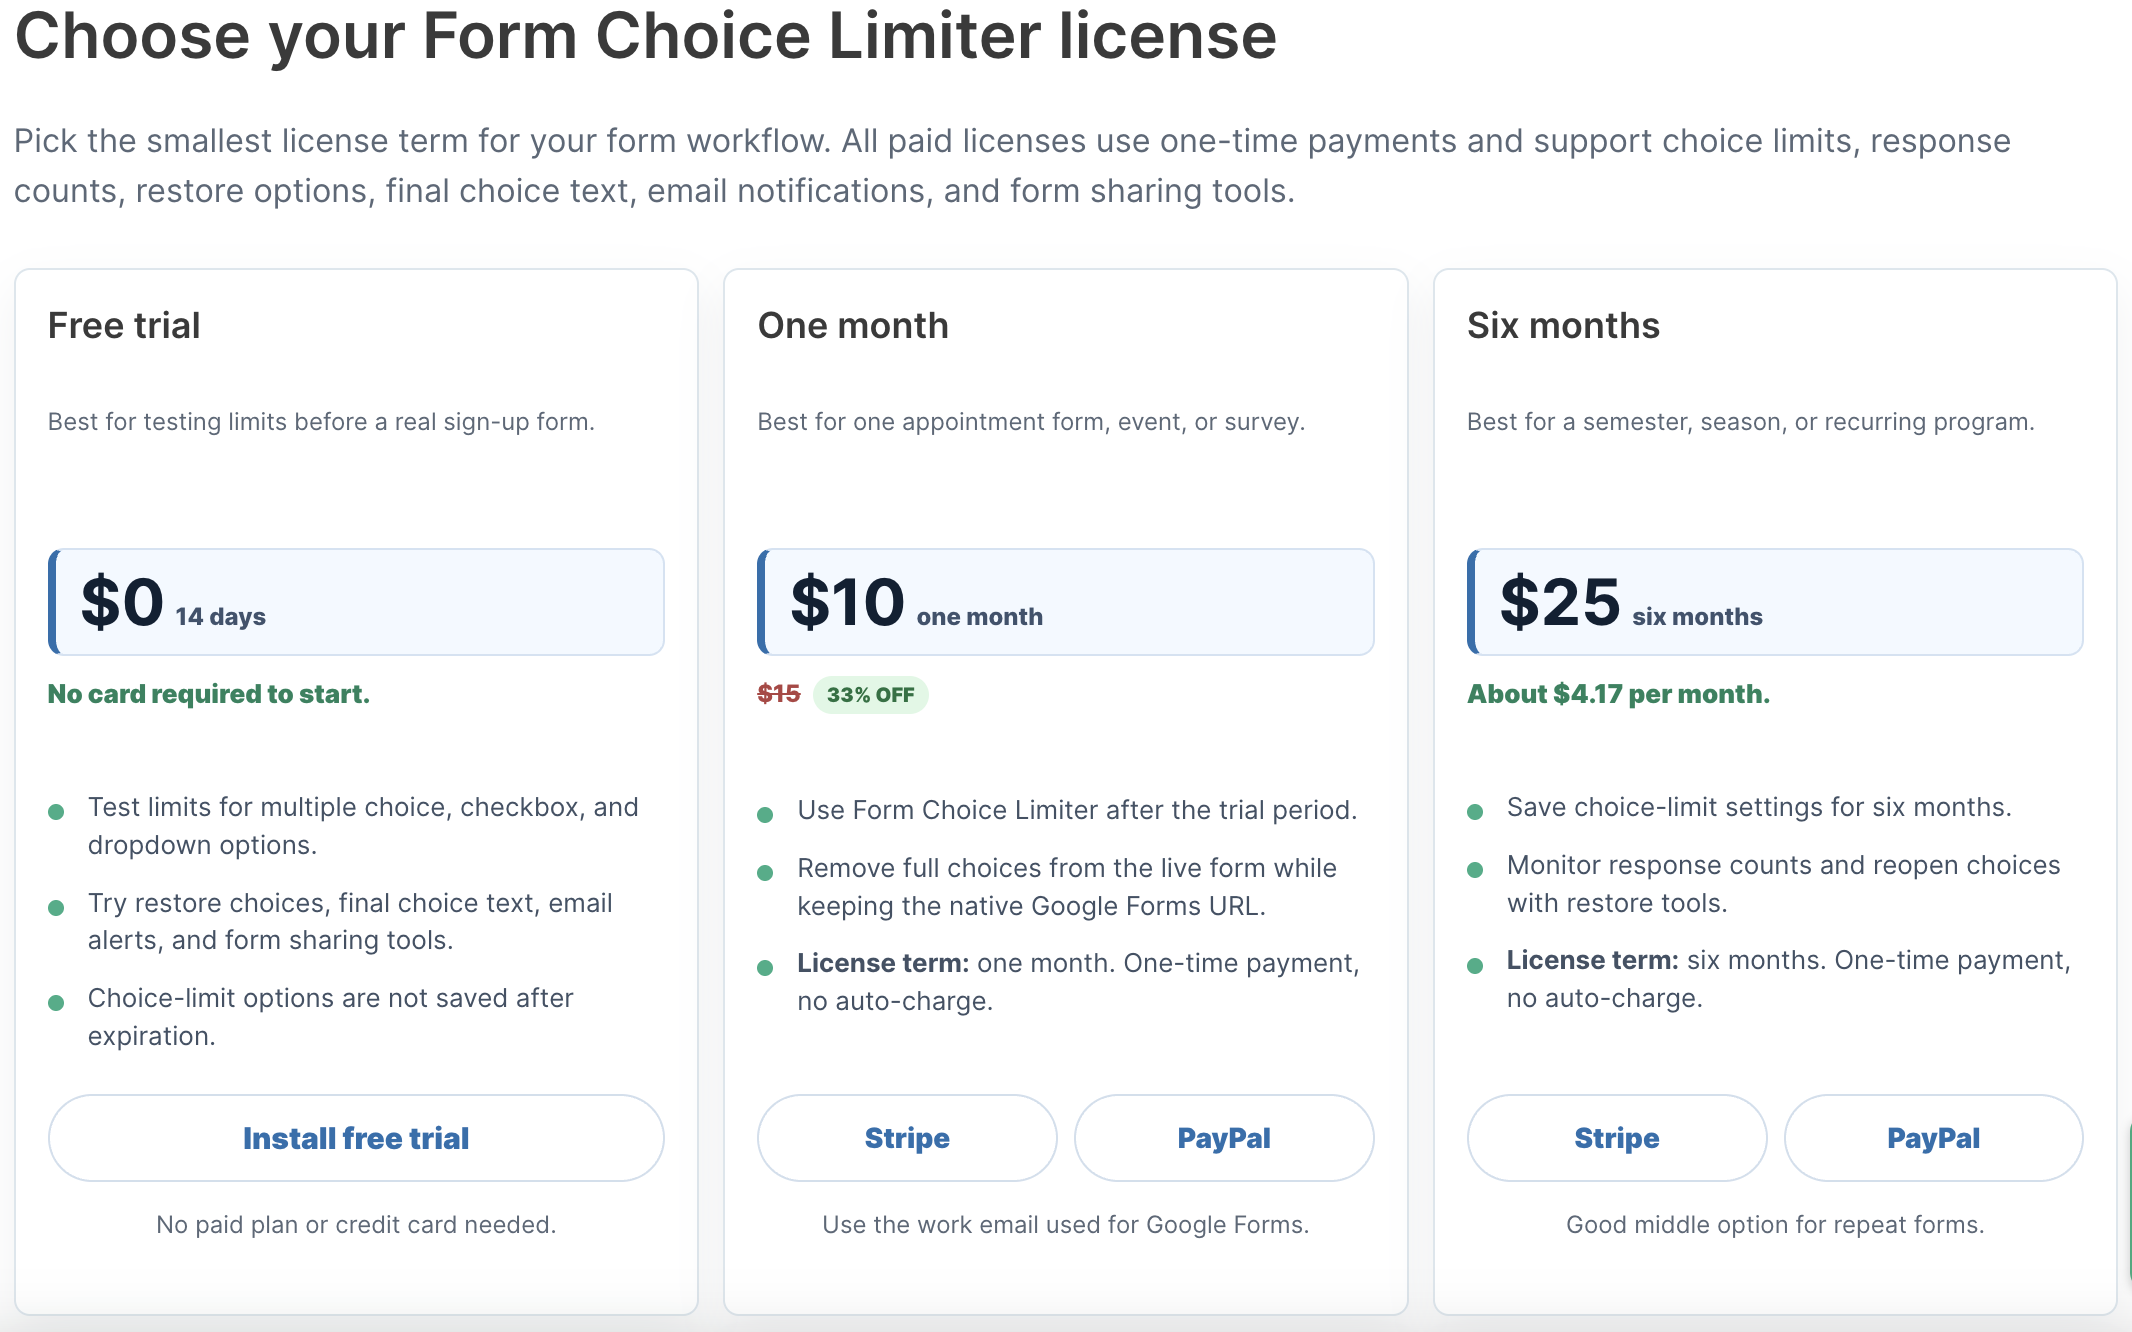
In the license sidebar, choose the plan you want and click the matching renewal or upgrade button, such as Renew 1 year, Renew 6 months, Renew 1 month, Buy Lifetime, or Buy Domain. A secure Stripe checkout page will automatically open in a new tab of your web browser.
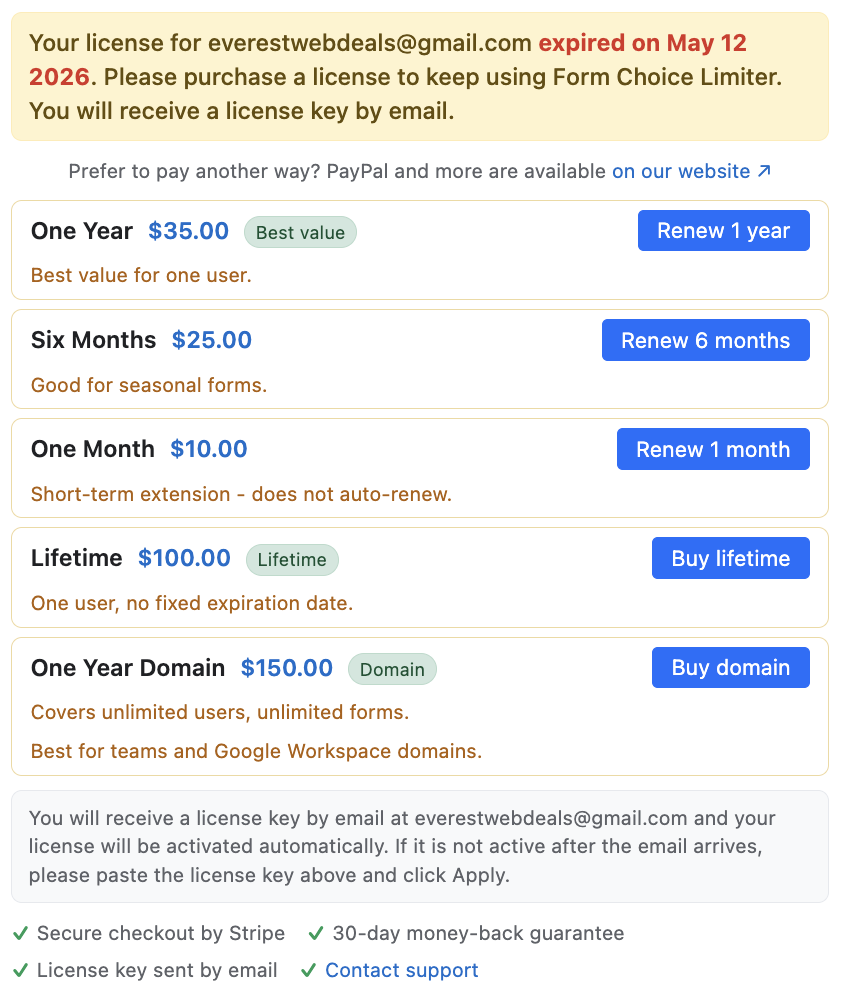
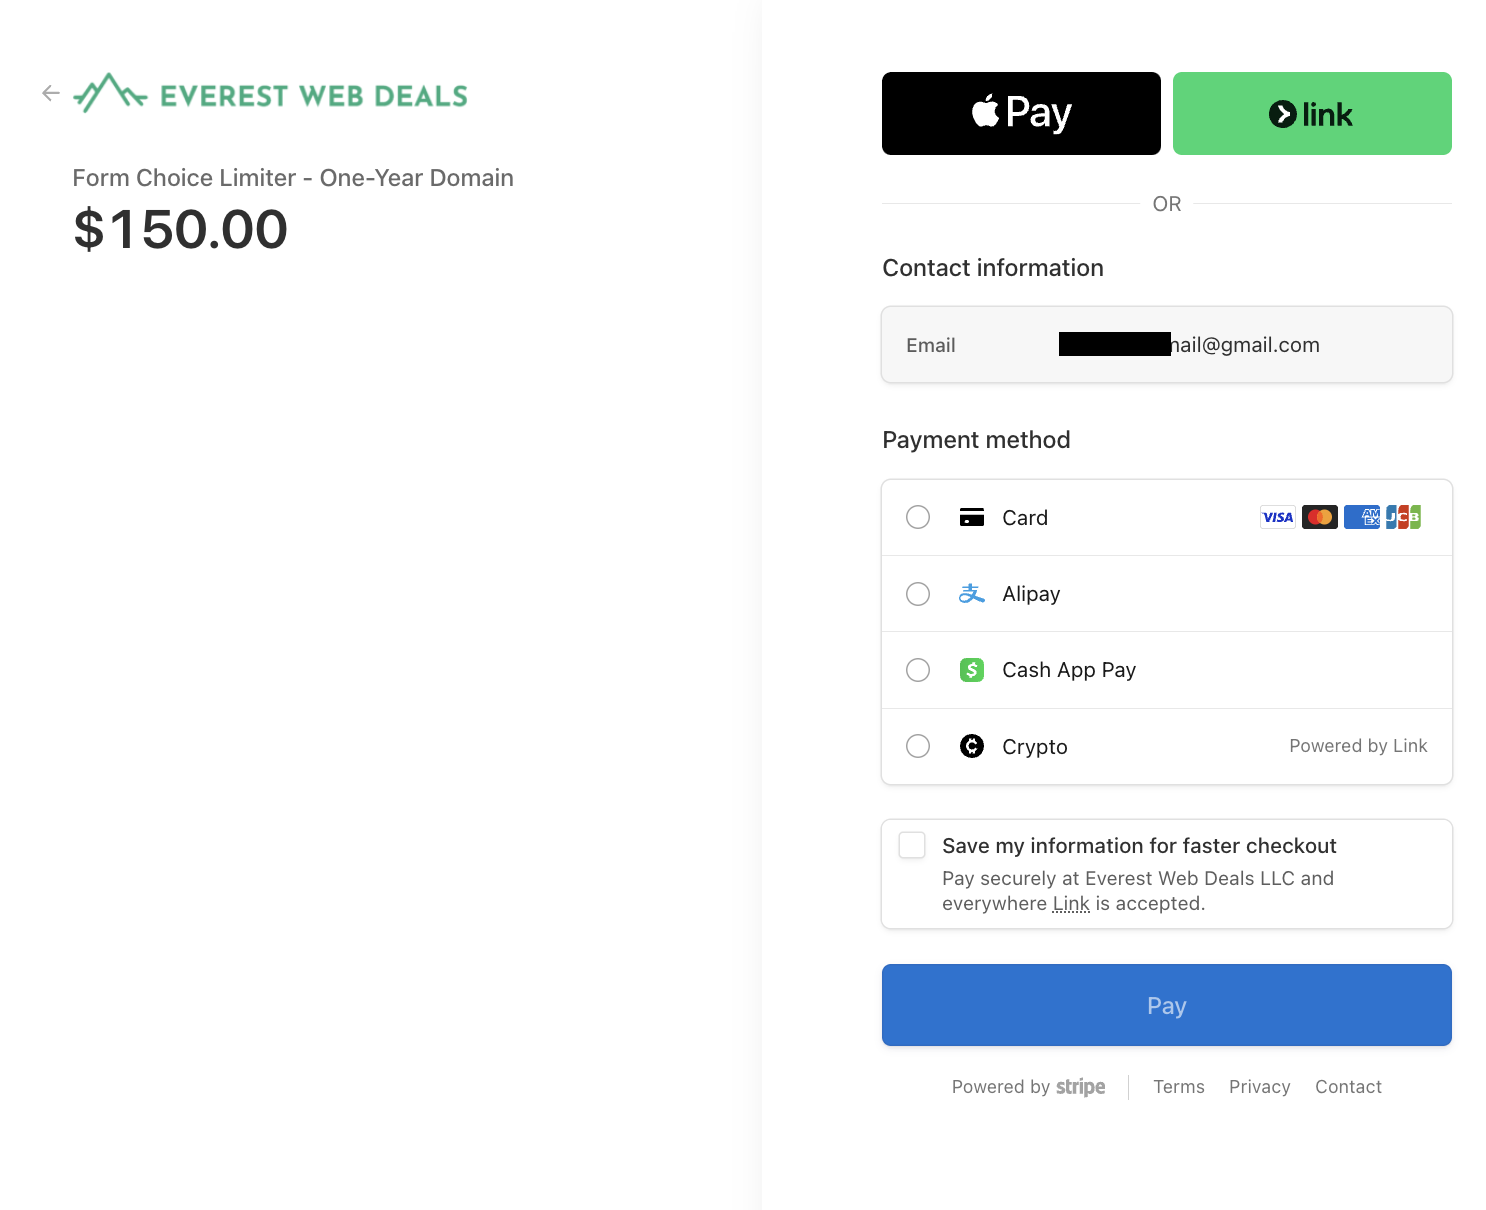
The Stripe checkout page will securely display the Google account email used by your Google add-on. This email is locked and cannot be changed in checkout. Complete the card payment, then return to the Google add-on. Your license will activate automatically within seconds.
Option B: Pay via Stripe links on our Website Pricing Page
Useful if you prefer to review all options on our website before buying.
Go to the pricing page for your Google add-on: Form Choice Limiter Subscription Pricing Page.
Click the Buy button next to your desired plan under the Stripe section. When checkout opens, enter the exact Google account email that you use with the Google add-on.
Once payment is completed, check your email inbox. You will receive an automated confirmation email from support containing your license key details. If you entered a different email address during checkout, you can follow the email instructions to easily assign the license key to your Google add-on account.
PayPal checkout Instructions
PayPal payments (including PayPal Credit, Pay Later, and standard PayPal accounts) are processed securely on our website pricing page. They are not available within the Google add-on sidebar.
If you pay via PayPal, your license key is sent to your PayPal email address. If your work email is different, you can easily transfer the license key to your work email (google add-on email) from the add-on’s License menu.
Review our data processing, security controls, and DPA compliance in our Security & Privacy Center.
Navigate to the pricing page for your Google add-on on our website: Form Choice Limiter Subscription Pricing Page. (Form Choice Limiter is shown here as an example; the same process applies to other Everest Web Deals Google add-ons).
Compare the tiers, select your plan from the dropdown list in the PayPal checkout box, then click the yellow PayPal button to check out.
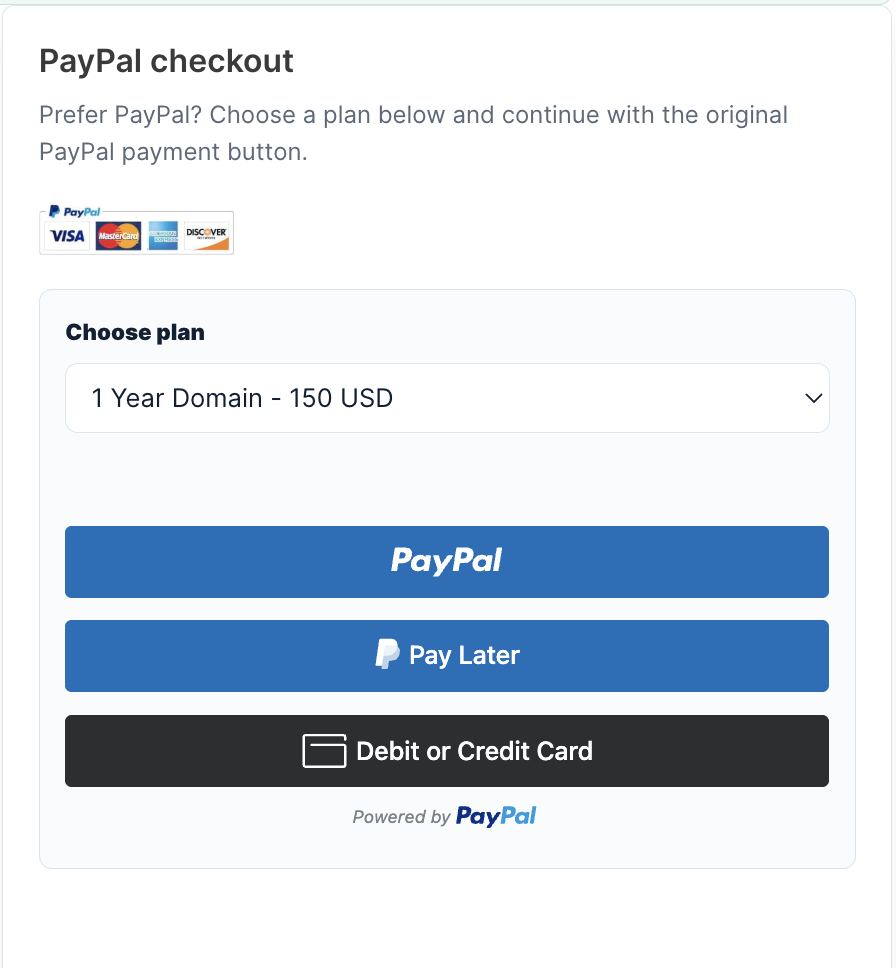
Once payment is confirmed, check your PayPal email inbox. You will receive an automated email from support containing your license activation details and transfer instructions. Follow the email instructions to bind/transfer the license key to the correct Google account.
Purchase Order Google Add-on Instructions — USA Only
We accept Net-30 purchase orders from USA public schools, school districts, universities, nonprofits, and corporations. We do not accept international Purchase Orders at this time.
Review our data processing, security controls, and DPA compliance in our Security & Privacy Center.
To submit a purchase order google add-on request, start by sending an email to support with your product choice, seat count/domain license details, and billing email. We will send you an official invoice quote and our pre-filled, signed W-9 vendor form within 24 hours.
Interactive Quote Request Builder
Once your school district's purchasing department generates and signs the Purchase Order (PO), email the PO document or number to support@everestwebdeals.co.
Upon PO receipt, we will activate your domain license key immediately. An invoice will be sent to your accounts payable department, payable by check or ACH within 30 days.
Frequently Asked Licensing Questions
No problem! After checking out via PayPal, open your email receipt and follow the instructions for reassigning the license email. Form Choice Limiter is only an example here; the same process works for other Everest Web Deals Google add-ons. You can reassign a license only once. If you reassigned it by mistake and need to reassign it again, contact us through the contact page. After buying or reassigning a license, open the Google add-on, go to License, and check the expiration date to confirm the license is active on the correct account.
If you entered the correct Google account email on the Stripe checkout page, your license will activate instantly. Simply refresh the Google add-on, then open the add-on menu, go to License, and check the expiration date to confirm the license is active. If the email is not correct, check the email address that received the payment confirmation for instructions on how to reassign the license. If the email has a typo or you did not receive the reassignment instructions, contact us through the contact page.
Yes. If you need to reassign your license to a coworker, check your original payment confirmation email for the reassignment instructions. You can reassign a license only once. If you reassigned it by mistake or need another transfer, contact us through the contact page with your invoice number and the new user's email address.
Do not cancel the payment or buy another license right away. The payment system may still charge you for the canceled payment attempt. Contact us through the contact page with your invoice number, the Google add-on you purchased, price, email address, and the Google add-on you need. We will help reassign the Google add-on license or resolve the issue.
Yes. We prioritize user security and data privacy, operating under strict compliance guidelines tailored for schools, districts, and corporate environments. You can review detailed information regarding data processing, security controls, student privacy, and download compliance documentation directly in our Security & Privacy Center.
Need Assistance with Your Payment?
We are here to help. Reach out to our billing team if you have any questions or need custom invoices.