Installing the Google Form Limiter
To use the Google Form Limiter, you need to install the add-on first. Open your Google Form, click on the three dots in the top right corner, and select “Add-ons.” Then, choose “Get add-ons,” search for “Form Response Limit, Form Limiter” and click “Install.” You can start using it once the installation completes.
Setting a Response Limit
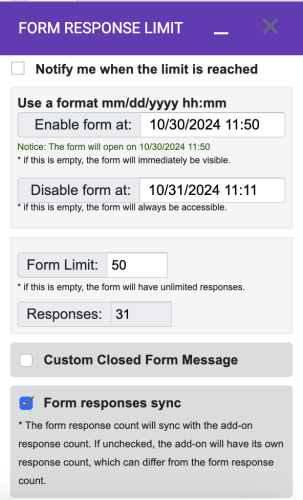
To set a response limit, open your Google Form, click the three dots in the top right corner, and select “Add-ons.” Next, choose “Form Response Limit, Form Limiter” and enter the allowed number of responses. Optionally, you can set a date and time for the form to close. Click “Save” to apply the limit.
What Happens When the Limit is Reached?
After setting the limit, the form will stop accepting responses once it reaches the limit. Users attempting to submit a response after the limit will receive a message indicating that the form is closed.
Benefits of Using the Google Form Limiter
The Google Form Limiter serves as an excellent tool for controlling the number of responses. It is especially valuable for limited-participant surveys or quizzes. With this add-on, you can ensure that your form won’t receive too many responses, and you can even set a closing date and time. Read more …
How to Edit Responses in Google Forms?
Managing and refining responses in Google Forms can often feel challenging, particularly when quick edits or user modifications are necessary. Although Google Forms lacks advanced built-in options for response management, its capabilities can be significantly extended using versatile add-ons such as Choice Eliminator for Google Forms, Form Response Limiter, and Form Timer Limits. By utilizing tools like Response Manager, managing and modifying Google Form responses becomes much easier. Read more…
Form Timer Limit

We also offer a free version of Form Limiter called Form Timer Limit that you can download. This version includes the following features:
- Set a Specific Start Date and Time: Determine when your form becomes active.
- Designate a Disable (End) Date and Time: Ensure your form becomes unavailable after a certain point.
- Limit the Number of Responses: Control how many responses your form can accept.
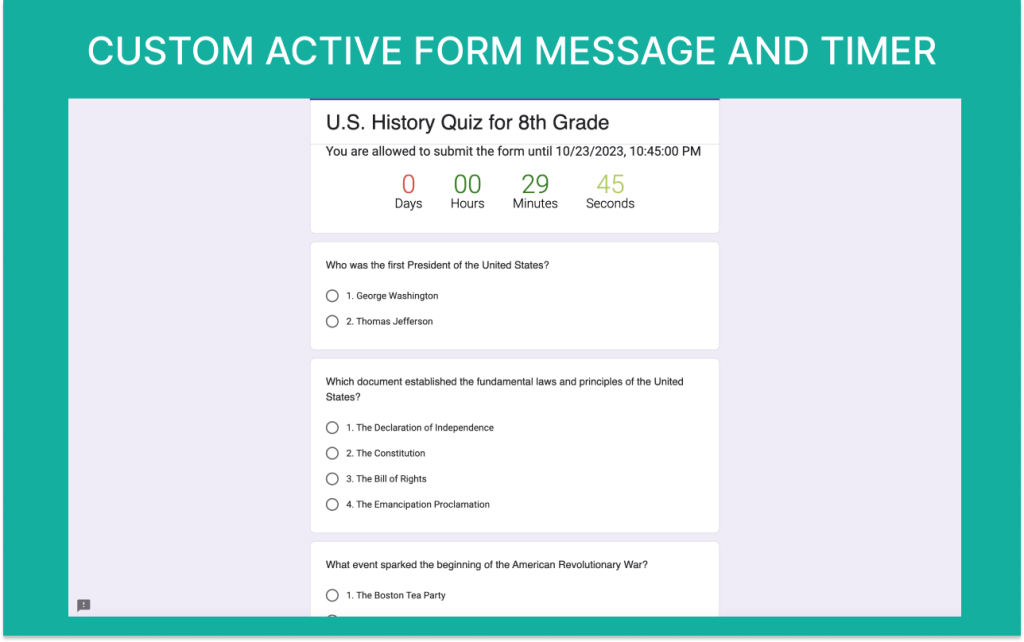
- Show Timer on the Form: Keep participants informed of the time remaining for submissions.
- Form Limit and etc…
You can download here.
Choice Eliminator for Google Forms™
Introducing Choice Eliminator for Google Forms™, the ultimate add-on to manage and control responses in your forms. It allows you to set limits for multiple-choice, checkboxes, grid, multiple grid, and dropdowns, automatically disabling options once the limit is reached. Perfect for event registrations, surveys, and any form where capacity needs to be managed, Choice Eliminator ensures you never overbook or exceed your limits. With real-time updates and customizable settings, it’s an essential tool for optimizing your form responses efficiently.
You can download here.

