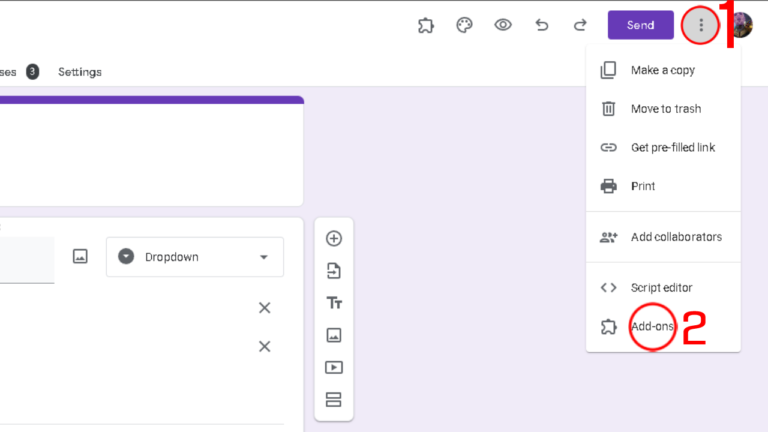
In your open Google Form, click the three dots (⁝) at the top right corner.
Select Add-ons from the drop-down menu.
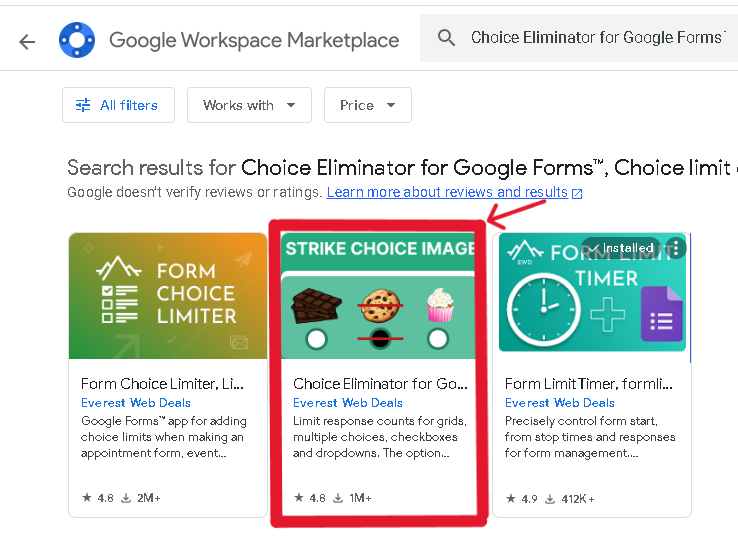
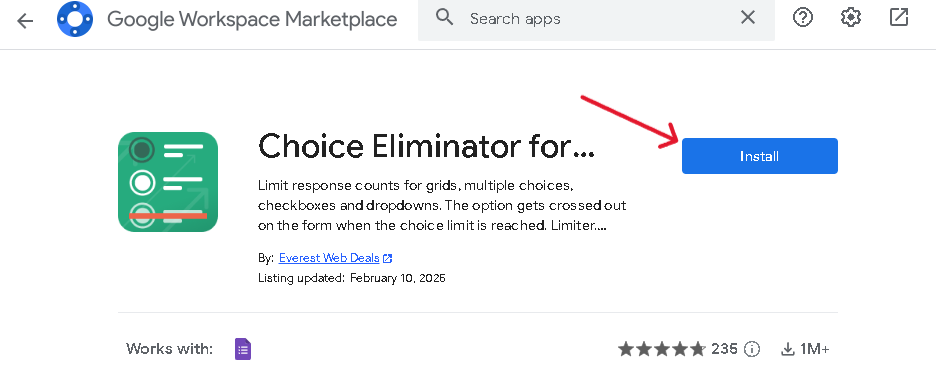
This will open the Google Workspace Marketplace. In the search bar at the top, type the name of the add-on you want to install (e.g., “Choice Eliminator for Google Forms”).
Click on the add-on that appears in the search results.
A window will pop up asking for permission to install the add-on. Click Install.
If prompted, choose your Google account and grant the necessary permissions for the add-on to work with your Google Form.
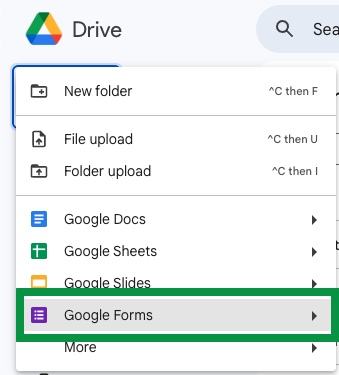
3. Launch the Add-on:
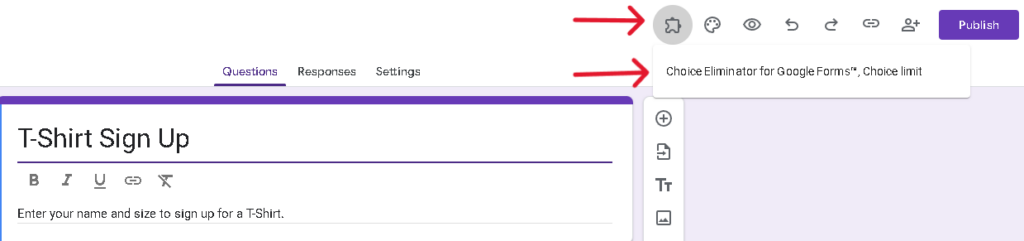
Open your form and launch the add-on from the menu.
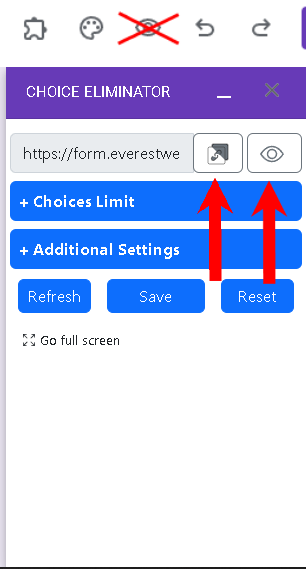
Note: The add-on uses a special URL (e.g., https://form.everestwebdeals.co/?form=your_form_special_id) instead of the standard Google Form URL.
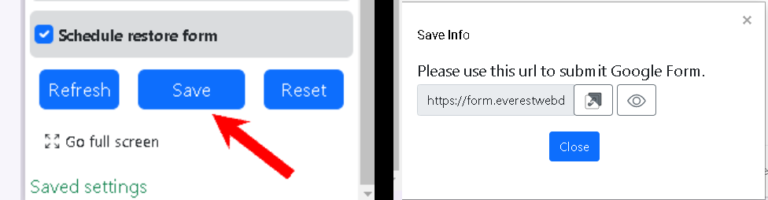
Copy the URL: Click the “copy icon.”
Preview the Form: Click the “eye icon” to open the form in a new tab.
4. Configuring the Add-on
Managing Response Counts:
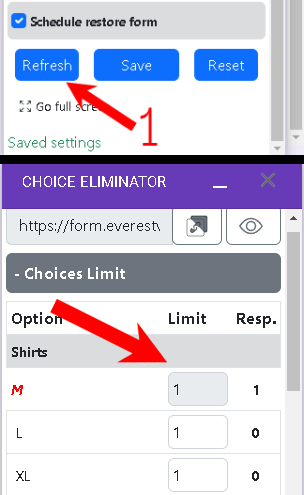
Refresh: Click the “Refresh” button to update the current response counts for your choices.
Save: Click the “Save” button to apply any changes and update counts.
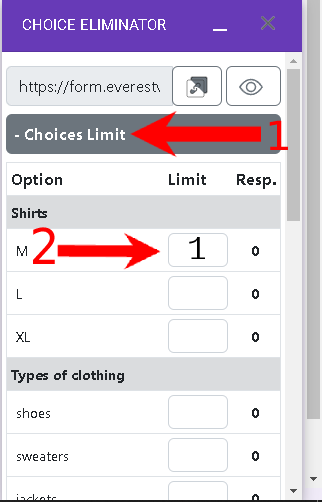
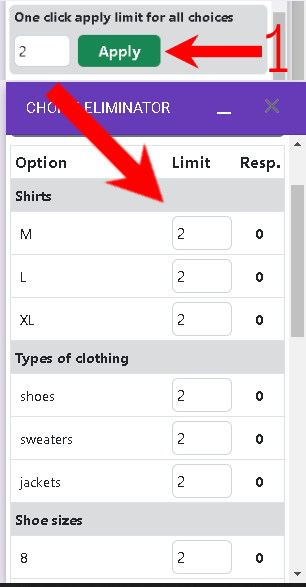
5 .Setting Choice Limits:
Individual Limits: Under the “Choice Limit” section, enter a number next to each option to set its limit. Tip: Leave an option blank for unlimited responses.
Uniform Limit: Use the “One-click apply limit for all choices” box to set the same limit for every option. Then, click “Apply” and “Save.”
6.Notification & Sign-In Settings:
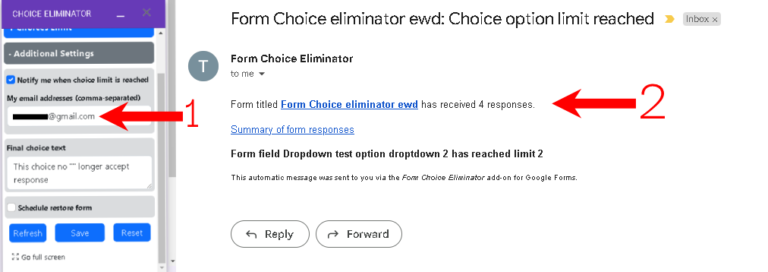
Email Notifications: Check “Notify me when choice limit is reached” and enter your email(s) (separated by commas) to receive alerts when an option hits its limit.
Sign-in Requirement: Enable “Sign-in required” if you want respondents to sign in before they can submit the form.
7. Display & Closure Options:
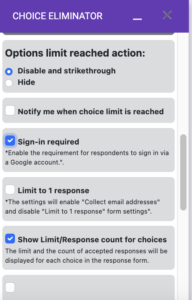
Options Limit reached action. If choice reached limit you can:
Disabled and strikethrough choice option in form
Hide – remove choices in form
Notify me when choice limit is reached. The add-on admin user can add an email to notify when the limit is reached.
Limit to 1 required. The responder can only ones submit the form.
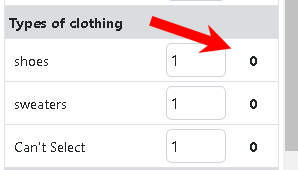
Show Limit/response count for choices to display the number of responses and the set limit next to each option.
8. Advanced Sharing & QR Code:
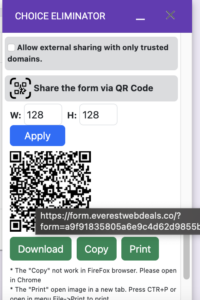
Restrict Access: Use “Allow external sharing with only trusted domains” to limit access to users from specific email addresses or domains.
QR Code Sharing: Generate a QR code for your form by clicking the “Share the form via QR code” option. You can download, copy, or print it for easy sharing.
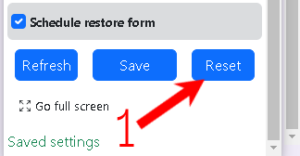
9. Scheduling Resets:
Please be careful, if you click on the “Reset” button all response data will be deleted and you never will recover it.
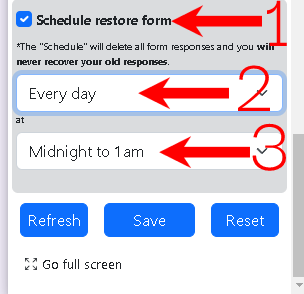
10. Scheduling Resets:
Please be careful. The “Schedule” will delete all form responses, and you will not be able to recover your old responses.
11. Previewing Your Form:
Important: Do not use the Google Forms’ preview button (top right). Instead, use the preview option provided in the add-on or click the special URL’s preview (“eye icon”). For a full-screen view, click the “Go full screen” button at the bottom.
12. Final Steps & Monitoring
Saving Your Configuration: Once you have set up all desired options, click “Save”. A small window will appear, providing the special form link and another preview option.
Checking Response Counts: Click “Refresh” periodically to update the response counts and monitor which options are reaching their limits.
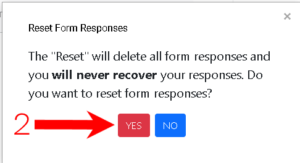
Resetting Data (Use with Caution): If needed, click “Reset” to delete all responses. A confirmation window will appear—confirm only if you are sure, as this action cannot be undone.
This guide should help you comfortably set up and use Choice Eliminator for Google Forms™ to control your form’s response options and manage submissions effectively. Enjoy the streamlined process and enhanced control over your Google Form responses! Troubleshooting and Instructions for Properly Setting Up the Form