Simplify Scheduling and Eliminate Overbookings Using the Form Field Limit Add-On
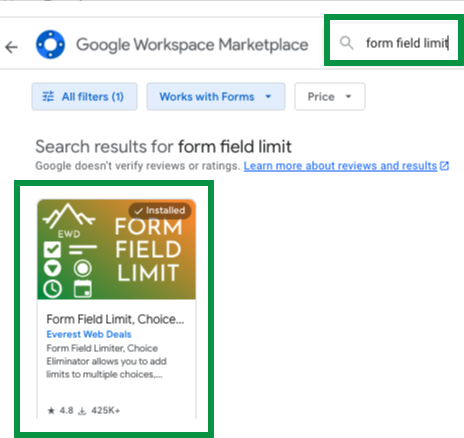
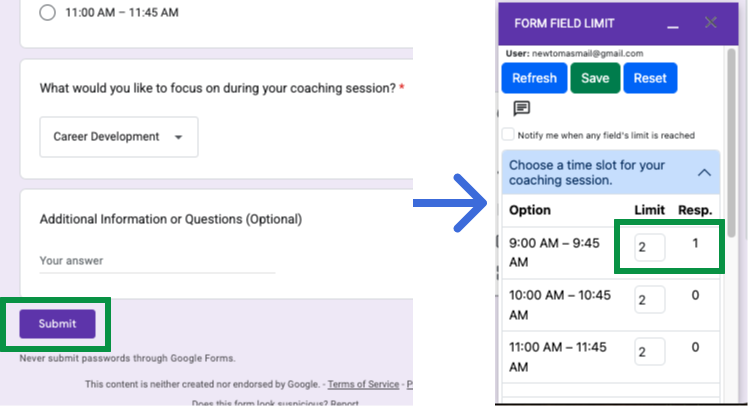
Struggling to manage your booking slots without double-booking or overbooking? Keep your schedule organized by using Google Forms and the Form Field Limit add-on. Whether you’re arranging student meetings, booking client appointments, or putting together an event planning form, this add-on helps you prevent conflicts by limiting how many people can select each slot—acting as both a choice eliminator and a form choice limiter.
1. Set Up Your Google Form
- Go to Google Drive
- Open Google Drive and click the + New button.
- YouTubeTutorial: How to Set Field Limits with Form Field Limit, Choice Eliminator Add-on
- Instruction: How to Edit Responses in Google Forms?
- Choose Google Forms to create a new Google survey or sign up form Google users can easily fill out.
- Select the Blank template.
- Give your form a clear title, for example: “Coaching Session Booking,” “Student Meeting Scheduler,” or “Workshop Sign-Up.”
- Add questions. For scheduling or appointment scheduler purposes, choose Multiple choice or Checkboxes.
2. Install the Form Field Limit Add-On
- Open the Add-ons Menu
- In your open form, click the three-dot menu in the top-right, then select Get add-ons
2. Search and Install
- In the Google Workspace Marketplace, search for “Form Field Limit” or terms like choice eliminator and form choice limiter.
- Click Install to add it to your form.
3. Configure Your Time Slots and Limits
- Open the Add-On
- After installation, click the puzzle piece icon near the top-right of your form.
- Select Form Field Limit, Choice Eliminator from the dropdown.
2. Set Limits
- Click Configure. A sidebar will open.
- On the sidebar locate the question that lists your time slots—for example, “Career Development”
- In the Limit column, specify how many respondents can select each slot.
- Add Limit (empty is unlimited response).
- Once a slot reaches its limit, the add-on hides or marks it as unavailable—preventing overbooking.
4. Publish and Share Your Form
- Publish Your Form
- Click Publish at the top-right of Google Forms.
- Confirm you want to make the form accessible to respondents.
2. Copy Your Link
- Click the link icon to generate a responder link.
- Click Copy button.
- Share via email, social media, or embed it on your website. Now your Google surveys can reach the right audience.
3. Test the Form
- Open the Form link in a new tab or different browser.
- Fill out a slot and click Submit.
- Then, return to the Form Field Limit sidebar
- Click to Refresh button to see the updated response count
Why Use the Form Field Limit Add-On?
- Avoid Overbooking: Automatically disables or hides an option once it’s filled—perfect for an appointment scheduler or event planning form.
- Stay Organized: Ideal for teachers, trainers, or anyone needing to create Google surveys for limited slots or resources.
- Real-Time Updates: Always know which slots are still open.
- Easy Sign-Ups: Participants see only the available time slots—no more back-and-forth emails.
Final Tips
- Use Clear Labels: Adding dates or specific descriptions (e.g., “June 12, 9:00 AM – 9:45 AM”) helps avoid confusion.
- Enable Notifications: Turn on email alerts to stay informed when a slot is fully booked.
- Review & Reset: If you host recurring events, reset the limits or duplicate the form for each new session.
- YouTubeTutorial: How to Set Field Limits with Form Field Limit, Choice Eliminator Add-on
- Instruction: How to Edit Responses in Google Forms?